Do you want to build your own smartphone, but don’t want to pay the premium prices of commercial models? With Raspberry Pi, you can build your own sim-free smartphone, and enjoy all the benefits of a high-tech device without the high cost. In this guide, we’ll show you step by step how to build a Raspberry Pi smartphone, and provide all the code you’ll need to get started.
Step 1: Gather Your Supplies
Before you start building your Raspberry Pi smartphone, you’ll need to gather a few supplies. You’ll need a Raspberry Pi board, a touch screen display, a battery pack, and a case. You’ll also need a few additional components, including a camera module, speakers, and microphone. You can find all the components you need on the Raspberry Pi website, or at a local electronics store.
Step 2: Set Up Your Raspberry Pi
Once you have all your supplies, you’ll need to set up your Raspberry Pi. To do this, you’ll need to install the Raspberry Pi Operating System (OS) on an SD card. You can find the latest version of the Raspberry Pi OS on the Raspberry Pi website.
Step 3: Connect Your Display
Next, you’ll need to connect your touch screen display to your Raspberry Pi. You can find instructions on how to do this on the Raspberry Pi website. Once you’ve connected your display, you’ll be able to use it to control your Raspberry Pi smartphone.
Step 4: Add the Camera Module
To add a camera to your Raspberry Pi smartphone, you’ll need to connect a camera module to the board. You can find instructions on how to do this on the Raspberry Pi website.
Step 5: Add the Speakers and Microphone
You’ll also need to add speakers and a microphone to your Raspberry Pi smartphone. To do this, you’ll need to connect these components to the Raspberry Pi board. You can find instructions on how to do this on the Raspberry Pi website.
Step 6: Add the Battery Pack
To power your Raspberry Pi smartphone, you’ll need to add a battery pack. You can find instructions on how to do this on the Raspberry Pi website.
Step 7: Install the Required Software
To make your Raspberry Pi smartphone functional, you’ll need to install a few pieces of software. You’ll need to install a mobile operating system, such as LineageOS, as well as the required drivers for your display, camera, speakers, and microphone. You can find instructions on how to install these components on the Raspberry Pi website.
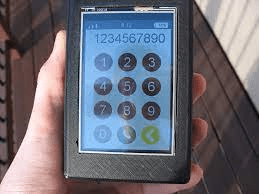
Step 8: Install the Phone Dialer and Contacts App
Finally, you’ll need to install a phone dialer and contacts app on your Raspberry Pi smartphone. You can find a range of apps that will work with your device on the Raspberry Pi website.
With these steps, you’ll have all the information
you need to build your own Raspberry Pi smartphone. While this project may require some technical know-how, it’s a great way to learn about electronics and technology, and you’ll end up with a functional, high-tech device that you can use and enjoy for years to come.
Additionally, building a Raspberry Pi smartphone can be a great way to save money, as you won’t have to pay for a commercial device. You’ll also have the satisfaction of knowing that you built the device yourself, and that you have full control over its software and hardware.
In conclusion, building a Raspberry Pi smartphone can be a fun, educational, and cost-effective project for anyone interested in technology and electronics. With a little bit of effort and determination, you can create your own high-tech device and enjoy all the benefits it has to offer. So why wait? Get started on building your own Raspberry Pi smartphone today!